Showing posts with label upcycle. Show all posts

Sunday, 5 February 2017

How to repurpose loom bands into a DIY woven heart

I don't know about you, but we seem to have alot of loom bands hanging around the house.

I though I would share this creative way to reuse them to make a woven heart.

I created this woven heart using:
- round wood slice (I bought mine from our local wood recycling centre. You could contact a tree surgeon, or maybe use an offcut of wood)
- paper heart template
- small nails
- hammer
- loom bands, but you could use elastic bands too

First I created a heart template in paper and stuck it to the wood with blu tack. I then tapped the nails in around the shape of the template. Finally I looped the loom bands onto the nails. It's as simple as that.

My design is super-simple, so you could adapt the idea to make it more intricate. You could fill the centre of the heart with more nails and criss cross the loom bands. Or maybe go for a more elaborate shape. How about using a whole rainbow of loom band colours?

I am really pleased with the way my DIY project turned out. I'm planning on making some more to put on our allotment. I may try a star shape next or my initials. I'd love to hear your ideas...

If you'd like to see more creative projects, head over to my Pinterest...I'd love to connect with you over there!

I am linking up with Trash to Treasure over on www.coombemill.com

Friday, 2 October 2015

Making a shoebox jetpack: a creative, upcycling idea for kids

Making a shoebox jetpack: a creative, upcycling idea for kids, craft, create
A couple of weeks ago Magoo asked if we could make a jetpack. I've got used to these kinds of requests since becoming a Mum. I knew we had an old shoebox waiting to go out in the recycling & thought the lid would make a good cardboard jetpack.
We grabbed our craft materials and Magoo set to work decorating the lid of the shoebox.
gluing, sticking, cutting, crafting with kids
You can never have too many glittery stars on a rocket backpack can you?
We also covered the top of the shoebox lid with paper to create a surface for Magoo to draw her control buttons onto.
drawing controls onto the shoebox jetpack
I knew we had some yellow and orange netting from a previous crafty project where were had made Easter bonnets back in April. So we reused our upcycled netting from our local Children's Scraptsore to make the jet flames
upcycled neon netting from children's scrapstore weston-super-mare
rocket boosters made with upcycled netting from children's scrapstore
We also used the netting to make arm straps so that Magoo could wear the jetpack on her back.
So after cutting, sticking and gluing an unwanted shoebox lid, the jetpack was finished and ready to play with...
Making a shoebox jetpack: a creative, upcycling idea for kids
Once all the decorating had been completed Magoo was desperate to try it on. She decided that a jetpack would definitely help her to ride faster on her bike...which I think it may well have done :)
handmade rocket booster makes you ride your bike faster
All you need to make this backpack is a shoebox lid (or maybe a cereal box), some thin netting or ribbon, glittery stars or stickers, glue, scissors and lots of imagination...
This week I am linking up with:
Whatever the Weather over on www.lifeunexpected.co.uk and Monkey and Mouse.
Country Kids over on the www.coombemill.com blog.

I'm linking up with #Trash2Treasure also on the www.coombemill.com blog.

Trash 2 Treasure

Friday, 25 September 2015

15 creative ideas for using vintage trims, ribbons, fabric scraps and haberdashery items

I have been selling vintage trim in my online shop for about five years now. I often wonder what creative projects people use the trim for. So I decide to put together a list of inspiration and ideas for utilising trim, ribbon, fabric strips and other haberdashery items. Some designs come directly from customer emails and the appreciation photos they send me. Some are my own sewing projects and the rest I have found via my travels around the web. I also have a vintage trim projects and inspiration board over on Pinterest. There you will find even more ideas to get your creative thoughts flowing…
15 creative ideas for using vintage trims, ribbons, fabric scraps and haberdashery items
1) Bookmark for a journal, diary or sketchbook
I put together this tutorial on my blog a few months ago for a handmade bookmark or strap to use on your journal/notebook. This book strap is pretty to look at, simple to create and useful. The perfect way to personalise your books, journal or a sketchbook. I’ve used a piece of my vintage woven fabric trim in mustard yellow and sage green to make the bookmark in this photo
tutorial for vintage trim or ribbon bookmark
2) Embellish skirts and aprons
You could try adding vintage trim to skirts, tunics, patch pockets and aprons to name but a few. There are lots of examples out there, but I love this beautiful girl’s skirt via Hanna Purzel’s blog. You can also see more of her sewing projects over on Pinterest.
You could try adding vintage trim to skirts, tunics, patch pockets and aprons to name but a few Hanna Purzel
3) Embroidery Hoop Wall Art
I love embroidery hoop art. I know the trend has been running for quite a while now, but it doesn’t seem to be falling out of favour just yet. The great thing there is no limit to what you can add to an embroidery hoop. So grab some ric rac, ribbon, vintage trim, buttons and get to work with various embroidery stitches to create your own piece of unique textile art. This hoop from Little Bit Funkygives you a taste of what can be achieved.
Embroidery Hoop Wall Art Little Bit Funky
I also love the hoop made with vintage fabric from Henhouse Homemade’s blog. Again, a mixture of fabric, vintage linens and trim would make a great patchwork hoop.
embroidery hoop textile art Henhouse Homemade vintage fabric
I’ve also spotted a book entitled “Hoop-La! 100 Things to do with Embroidery Hoops”. It’s high on my wish-list for books I’d like to own. Take a look at the Youtube video advertising the book to get a taste of what’s inside and to inspire you further.
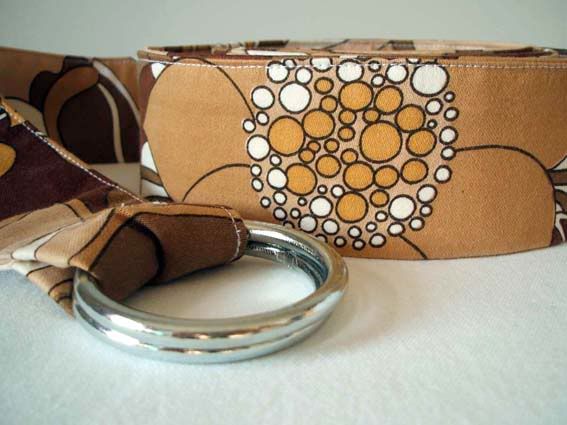
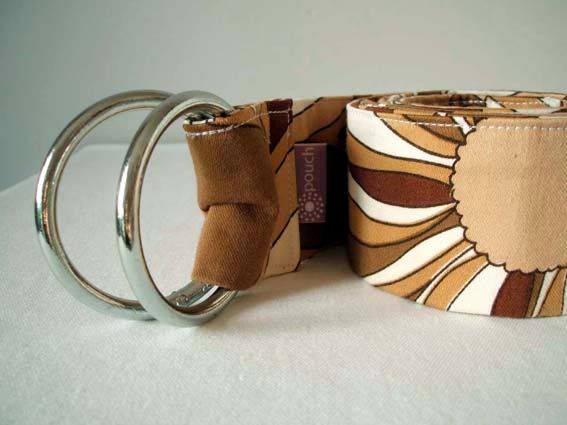
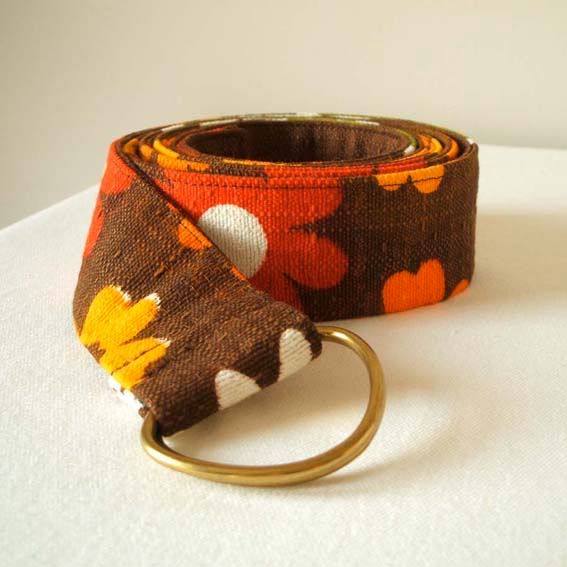
4) Vintage trim belts
Using trim on a handmade belt is a great way to add a retro twist to your outfit. Perfect for adults and children. Take a look at this tutorial from Sew Very for reversible trim fabric belts. This idea is definitely on my to-do list…
sewing tutorial for handmade vintage trim belt from Sew Very
5) Dog collars and leads
In a similar vein to belts, narrower trim can also be used to make DIY Dog collars and leads. Again there are lots of tutorials out there, here are a few of my favorites: Think Crafts, Totally Stitchin and Dog Paw Print.
tutorial for DIY handmade dog collar from Think Crafts
6) Upcycled painted key necklaces or decoration.
This is another favourite of mine. Love the idea of combining old keys and vintage trim or ribbons to make an interesting display in your home. I would probably create quite a few to hang from hooks on a piece of driftwood. You could mix any combination of trim and key colours or you could stick to a certain theme to fit in with your home’s colour scheme. Take a look at Maize Hutton’s blog for further ideas.
DIY painted keys from Maize Hutton upcycle jewellery trim ribbon
Alternatively you can wear the keys as an interesting piece of upcycled jewellery. Take a look at Jessica in Your Ear’s blog post for more inspiration. Again the combinations of trim and key colour are endless.
upcycled painted key jewellery from Jessica in Your Ear
7) Adding detail to a bandana
A simple way to add extra detail to a bandana or headscarf is to stitch some vintage trim or ribbon around the seam. I made this bandana for my daughter and added the trim to make a tie. There are lots of bandana tutorials out there, such as this one from Straight Grain and then adapt it with trim or ribbon of your own choice. Great for small children, bandanas tend to stay on a bit better than traditional sun hats. Also perfect for adults to give your outfit a folksy, festival vibe.
adding vintage trim to child's bandana folk festival sewing handmade
8) Crazy Quilts
I don’t really claim to be much of an expert on quilting. But apparently there is such a thing as Crazy Quilts and quite frankly I love them. This is a definition taken from crazy quilts on wikipedia.org:
“Crazy quilts differ from "regular" quilts in other ways as well. Because the careful geometric design of a quilt block is much less important in crazy quilts, the quilters are able to employ much smaller and more irregularly shaped pieces of fabric. In comparison to standard quilts, crazy quilts are far more likely to use exotic pieces of fabric, such as velvet, satin, tulle, or silk, and embellishments such as buttons, lace, ribbons, beads, or embroidery. Crazy quilting as a textile art is extremely creative and free-flowing by nature…”
Debra Dorgan All Things Pretty crazy quilt textile art mixed media art
Some of my favourite examples come from Debra Dorgan, the creative mind behind All Things Pretty. I love the way she combines fabric and trim to create a riot of colour and texture. There are some beautiful examples over on Allie’s In Stitches blog. You can also visit indulgy.com to see a beautiful photo of a selection of stitches used in Crazy Quilting.
crazy quilt stitches Allie's in Stitches blog trim, ribbon, fabric, textile art
9) Add vintage detail to a cylinder lampshade
I have found through customer emails that one of the most popular uses for vintage trim is to use it to add retro detail to a lampshade. Take a look at this tutorial from Beach Vintage. It shows you a step-by-step guide to recovering a cylinder lampshade with fabric and trim. Just looking at it makes me want to grab a glue-gun and make a heap of lampshades for my home.
repuposing, recovering, upcycling cylinder lampshade Beach Vintage tutorial blog
10) Create a naked or skeleton lampshade
Another take on the lampshade idea is to create a skeleton or naked shade. Quirky and unique, you can combine just about any fabric or ribbon for this project. The sky is the limit. There are some great examples out there, many use fabric scraps, but you could make one with a combination of fabric and trim.
Pursewna Pursewna creates a different twist on the naked lampshade by tying the fabric across the frame rather than wrapping it. Her original inspiration came from The Pleated Poppy. It’s worth taking a look at both blogs to get more ideas. The naked lampshades featured here are clockwise from top left: Dottie Angel; The Pleated Poppy; lystadsvingen.blogspot.com; Pursewna Pursewna
fabric covered naked or skeleton lampshades, upcycle, fabric, ribbon, trim
11) Ribbon hoop mobile decoration or garland
I’ve seen a few of these over the past few months and I think they would look great with a mixture of ribbon, fabric and vintage trim.
You can either make a mobile version using a hoop to hang from the ceiling. If you take a look at my vintage trim Pinterest board you can see people make many versions of hoops and wall hangings for children’s rooms, parties, weddings and the classroom. I think they are pretty, tactile and colourful. This is another project high on my to-do list. Take a look at this tutorial for a hoop mobile over on Shannon Berry’s blog. There are lots of wedding decoration ideas out there, try Brit + Co and A Low Country Wedding to see some pretty examples using ribbon, trim and fabric strips.
trim or ribbon hoop, garland, tutorial blog, wedding decoration ideas
Another twist on the hoop idea is to create a garland. There is a great tutorial over on The Scrap Shoppe blog using fabric strips. I think it would be interesting to add trim and ribbon into the mix. This is a lovely no-sew project, so could easily get children involved with making one.
Rag Ribbon Garland from the Scrap Shoppe tutorial blog
12) Fairy Lights
I first saw fairy light like this on a stall at Lou Lou’s Vintage Fair in Bristol a few months ago. I was peering at the lights and realised they were made with covered plastic shot glasses with fairy lights threaded through. There are oodles of tutorials out there. The top two photos in the image below are from Ruususuu and use paper cups. There are more ideas over on itsamakkie.blogspot.co.uk and rebeccasdiy.blogspot.co.uk. You can combine vintage fabric on the shades and then add trim or ricrac along the edges. Again the combinations are endless and they look amazing hanging from a fireplace or bookshelf.
tutorial paper cup fairy lights from Ruususuu and Rebecca's DIY blog
13) Christmas Stockings
A friend of mine gave me a lovely collection of vintage trims a couple of years ago. I had been waiting for inspiration to come to me and I hit on the idea of making felt Christmas stockings with trim detailing. They are simple, but effective and the trim is so festive. I'm really pleased with the way they've turned out.
handmade felt christmas stocking with vintage trim detail from Pouch Vintage
14) Fabric, yarn and ribbon wreaths
Yarn wreaths have become incredibly popular recently. Alongside yarn, wreaths can be made with vintage fabrics, ribbon and trims. Katie Runnels, the creative mind behind The Constant Gatherer makes some of the best examples I’ve seen.
fabric, yarn and ribbon wreaths The Constant Gatherer Katie Runnels handmade
There are heaps of wreath tutorials out there. I’m particularly in love with this vintage fabric sheet version from In Colour Order. It would be nice to add some vintage trim or ribbon into the mix to add extra retro detail.
tutorial for vintage fabric handmade wreath from In Colour Order blog
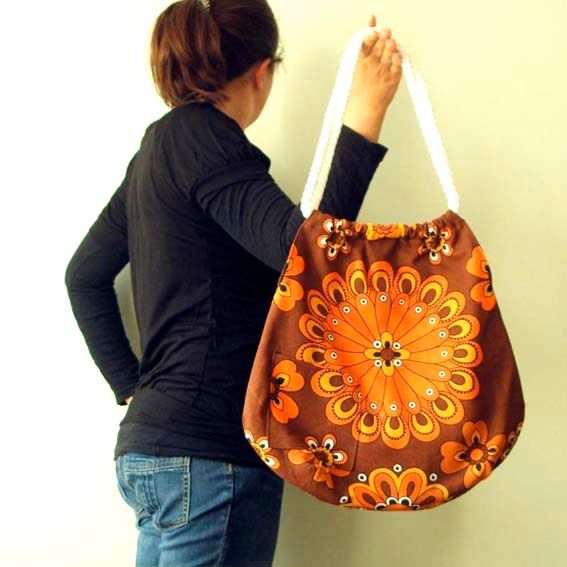
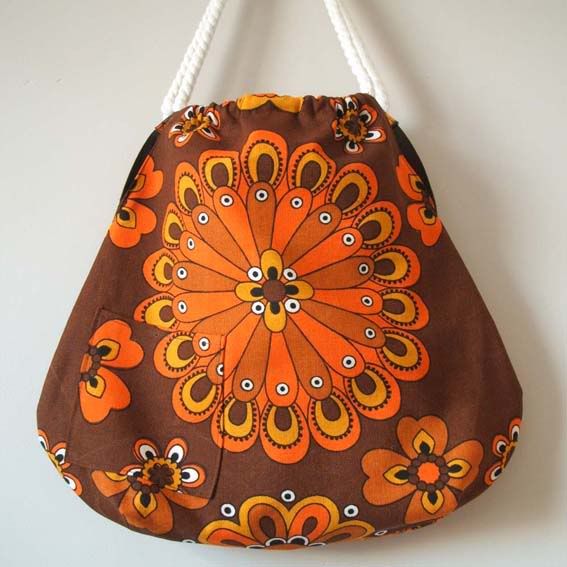
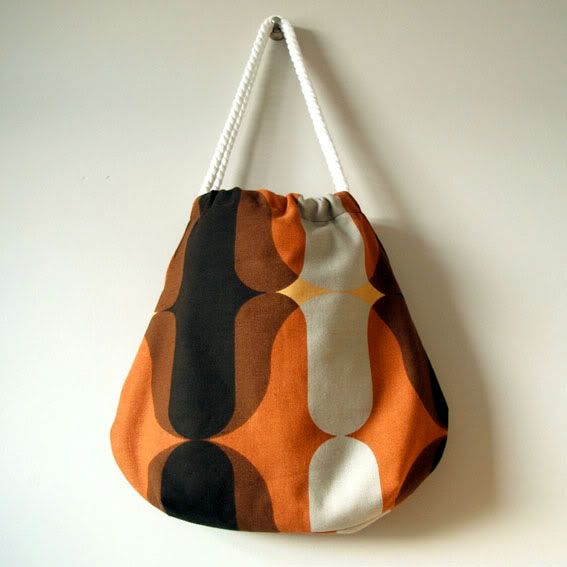
15) Embellish a bag or purse
I’m a big fan of bags, especially totes. So a tote combined with vintage trim ticks lots of boxes for me. It’s no wonder I fell in love with this bag featured on the Lola Nova blog. Grab the Carryall Bag pattern from Fabenmix and add your own modification and embellishments.
15 creative ideas for using trims, ribbons, fabric scraps and haberdashery items, embellish a bag or purse Lola Nova and Fabenmix
Another lovely example is this purse from Karen Meyers made from a repurposed wool jumper with vintage trim detailing. It is featured on the Grains of Earth blog post – 18 ways to upcycle old sweaters.
15 creative ideas for using trims, ribbons, fabric scraps and haberdashery items, embellish a bag or purse Karen Meyers Grains of Earth blog
Follow Pouch's board vintage trim projects & inspiration on Pinterest.
I hope you have enjoyed my list of creative ideas and uses for using trims, ribbons, fabric scraps and haberdashery gubbins. Please head on over to my Pinterest board for further inspiration. The projects included in this blog post are for personal crafting use. Please do not employ for commercial use unless the specific tutorial gives permission for this. I have made a great deal of effort to credit all the designs featured here. If you share this post, please take the time to credit their hard work. Thank you & happy crafting!
I'm linking up with The List over on youbabymemummy.com

You Baby Me Mummy


Saturday, 1 February 2014

Chalk it up

Curiosity has got the better of me and I have succumbed to the chalk paint craze.

I've heard it mentioned in lots of blog posts, twitter discussions and on several episodes of the Great Interior Design Challenge on BBC2. I know that the Annie Sloan brand is the chalk paint of choice, so I took a trip to my nearest stockists and bought some paint and wax. I just had to see what the fuss is all about...

Lock, Stock and Sparrow is situated on the edge of Weston-super-Mare and it is well worth a visit. If I had a bottom-less bank account I would fill my home with their lovely stuff. They stock a mixture of restored, painted furniture and some pieces in their stripped-back, natural form. There are many quirky pieces, all solid and fantastic quality. Their sturdy selection of furniture makes flat pack stuff look a bit feeble...you know that each piece is an investment and will last for many years.

The guy we spoke to was very helpful, didn't rush us and showed us lots of pieces of furniture painted in a number of Annie Sloan shades, plus some Farrow & Ball colours.

I'm going to try the paint out tomorrow. My Gran has given me an antique wardrobe that has seen better days. Using chalk paint is supposed to be quite addictive once you start using it. I'm already eyeing up pieces of tired furniture that could do with a once-over...plus I'm looking at lots of furniture on ebay that I could give a paint-job to. I'm going to need a bigger house at this rate!

http://www.anniesloan.com

Lock, Stock and Sparrow

Friday, 19 July 2013

Breathing new life into old furniture

Since moving to a 1930s house, I'm determined to furnish it with quirky, one-off pieces rather than mass produced stuff. I've already blogged about my beautiful (bargain) dining table. Now I want to show you a cabinet and shelves I recently repurposed with help from my other half. I haven't done anything fancy or ground breaking with them...but it just shows how a simple lick of paint can breathe life back into something deemed a bit 'scruffy'.

In fact the small cabinet was considered so scruffy it was making its way to the municiple tip before my Mum and husband rescued it. My Mum approached the man who was just about to fling it into the 'wood' section and he happily handed it over. They bought it home for me and declared proudly that they had 'bought me a present'. Now, I know lots of people would be a bit annoyed about their presents coming from a waste-sorting centre, but my family know me better than that...

My husband sanded it down and chiselled off the yucky cork matting which was glued to the top. It was then painted in an ivory shade and once dry, we put it in our conservatory. It's the perfect place for me to put my cup of tea and my daughter has filled it with her books. It's a sturdy, little multi-functional piece of furniture and I love it.

A few weeks back my Mum gave me a set of shelves. They had been hanging in her garage for years and were looking a bit unloved, but I could see they still had potential! We repeated the same process with the shelves as the cabinet, sanded it down and a coat of ivory paint to spruce them up a bit. They now hang in our bathroom and keep all our toiletry gubbins tidy.

Even Mr Bump is amazed by the transformation!

**update**

Since writing this blog post I have watched the first episode of "Kirstie's Fill Your House For Free". I wanted to write a quick update. I've always been keen on getting my hands on furniture for free or at a bargain price. I've been using Freecycle for years and often scour Ebay and Gumtree for second hand items for our house. I had a quick look on Twitter after the first episode had aired and there was alot of cynicism and negativity. Many people were saying the items aren't truly 'free' if you have to use power tools, paint and the skills of top designers to alter them. But I think that misses the point. This is telly-land after all and lots of these shows are based on the 'big reveal' at the end. Even by employing designers, there was nothing on the show that the average Joe couldn't replicate. Well, maybe sawing an iron bath in half with an angle grinder isn't for everyone...but most of it was pretty do-able. Some basic DIY and a bit of elbow grease is all you need to start filling your home with quirky, one-off pieces. I think any show that encourages people to re-use rather than buy new is good in my books.

What I do hope this show encourages, is not just getting stuff off freecycle etc...I hope it encourages people to donate to freecyle, charity shops, local recycling projects. We need people to think twice about taking old furniture to the tip. What's not to like about clearing your clutter via freecycle? People come and get stuff you don't want direct from your house - you don't have to lug it into the boot & drive to the local waste centre. And many charity shops & furniture projects collect items from your house for free.

In fact, after watching Kirstie's program, I was inspired to write to my local MP. I've been to our local waste recycling centre with garden waste on a number of occasions and seen wonderful pieces of furniture being chucked into the wood section. On one occasion a perfectly usuable cabinet was thrown away & I approached a member of staff to ask if I could have it. I was told that staff are not allowed to pull things out of the containers because they will get sacked for 'theft'. I think it's awful that my local council does not seem to want to send less waste to landfill. It's actively discouraging the reuse of furniture and encouraging more waste. It's a case of trying to join up the people who want to get rid of stuff with the people who want to reuse the stuff.

I'm still awaiting a response from my MP, I'll keep you posted......

Thursday, 30 September 2010

Autumn colours

Photobucket

I have been listing a number of totes, belts and owls in my Etsy store over the past few days. They all have a distinctly Autumnal feel to them (love the word Autumnal, almost as much as I love the word haberdashery).

There are lots of shades of burnt orange, russet red and mustard yellow. I love vintage fabric, but I have a particular weakness for brown and orange hues, which is lucky as nearly everything was brown and orange in the 1970s!

Photobucket

Photobucket

Photobucket

Photobucket

Photobucket

Photobucket

Photobucket

Click here to find out more about the new additions to my Etsy store

LinkWithin

Related Posts with Thumbnails