Showing posts with label allotment life. Show all posts

Friday, 30 December 2016

A year on the allotment: December 2016

brussel sprout crop on our allotment plot

In December it's all about the sprouts. The plot is looking very sparse at this time of year, but this crop thrives in cold weather. We've never grown sprouts before and I'm so chuffed with the amount each stalk has produced.

brussel sprout tree growing on our allotment

We wanted to eat homegrown sprouts on Christmas Day this year. Having an allotment means planning ahead, so we were thinking about the festive dinner way back in April when we planted the tiny plug plants.

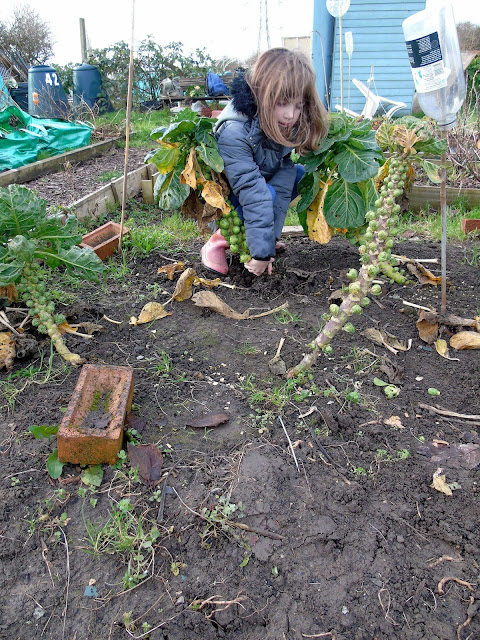
It was so lovely to walk to the plot on Christmas Eve as a family to pull up our sprouts. They are tough plants and take some effort to get out of the ground. It's amazing to see the small seedlings transform into these tall, tree-like plants.

child pulling brussel sprout tree from the ground

digging up brussel sprouts in december on our allotment

harvesting brussel sprout trees on our allotment

On Christmas Day my Mother-in-Law and Mum set to work preparing our homegrown brussel sprouts. Mr. M was in charge of cooking and he decided to lightly fry the sprouts with onion and bacon. I prefer this way of cooking them to the traditional 'boil 'em to death' method. They were delicious and couldn't have been fresher.

This is my final allotment post for 2016. I have written a blog post for each month of the year and gathered them all together over on the "Our Allotment" page. Looking back through the posts brings back so many fantastic memories. I love watching the seasons change and to see all we've achieved over the past twelve months. We don't have masses of time to dedicate to the plot due to work and home commitments. But even so, we've managed to harvest lots of tasty homegrown veg.

Back in January 2016, I wrote a post about "Five ways an allotment makes family life better". I still strongly believe owning an allotment gives you a better understanding of food production, contributes to health and well being, promotes a nurturing and patient attitude, you get to eat fresh produce with low food miles and you feel part of a community.

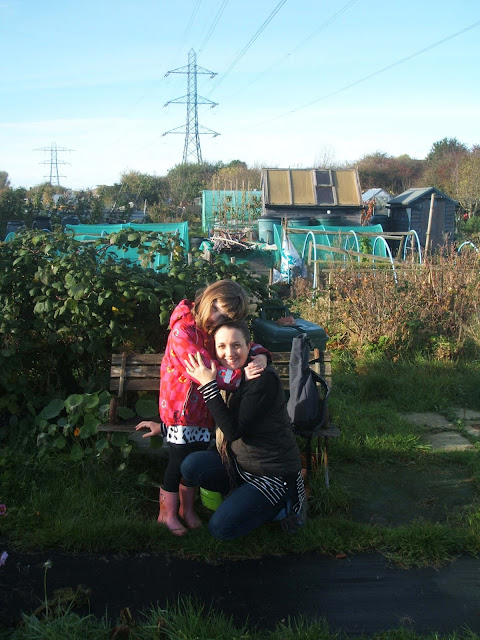
I've posted lots of pictures of our harvest over the past twelve months, so I'll finish this post with a rare photo of me and my gorgeous girl together on the plot. Here's to 2017 and hopefully it will be filled with lots more muddy boots, seed planting and harvesting...

family time on our allotment

This week I'm linking up with these lovely blogs:

"How Does Your Garden Grow" over on mammasaurus.co.uk

"Country Kids" over on www.coombemill.com

Thursday, 28 July 2016

A year on the allotment: July 2016

July featured some of the hottest days of the year so far. The warm weather means our crops start to reach peak production. It also means more trips to the allotment to water the plants...which I don't mind as it's better than going to a gym.

This year we've had our first crop of blackcurrants. We've picked loads and I've heard people talking on Instagram about it being a 'good year' for blackcurrants. They are certainly very juicy. I made an apple and blackcurrant crumble with some of them, it was delicious. I don't think I've ever eaten fresh blackcurrants and it packed a real taste punch. Magoo declared the crumble was 'too tasty'...which I think is a thumbs up!

It's also the first year our Gooseberry bush has produced fruit. We've had lots of fat, juicy gooseberries which I made into a compote to pour over fresh yogurt.

Summertime means plenty of people are out and about at the plot. It's always lovely when someone passes on some of their vegetables to us. This year our broadbeans have been virtually wiped out by slugs and black fly. They look so moth eaten and only have a few tiny bean pods hanging off the sides. One of our neighbours felt sorry for us and handed me a bagful of broad beans from his plot. He also gave us a bunch of freshly picked radish. We have some growing on our plot too, but I never like to turn down free veg...

The community aspect of allotmenteering features in my five ways an allotment makes family life better blog post. In my opinion, allotments are one of last true community spaces we have in towns and cities. They are open to all, affordable and act as a green space in urban environments.

Thankfully, the peas Magoo planted in her raised bed have produced lots of pods. The broad beans in her raised bed have fared better than the ones planted out in the main beds. We've been picking a few pods each time we go to the plot. Popping peas straight out of the pod and eating them raw is one of the best perks of growing your own food.

July marks the month when the allotment beds are full to bursting. At this point in time we currently have the following crops growing on the plot:
- Parsnips
- Broad Beans
- Celeriac
- Beetroot
- Sprouts
- Potatoes
- Strawberries
- Butternut Squash
- Runner Beans
- French Beans
- Peas
- Raspberries
- Tayberries
- Rhubarb
- Sunflowers

We've managed to squeeze in quite a few after-school trips to the plot with Grandma. It's always lovely to catch the last of afternoon sun and Magoo loves running around after being in class all day. We're now in the first week of the school holidays and we're planning a visit to the allotment later today. Hopefully there will be more peas to pick...

This week I'm linking up with these lovely blogs:

"Making Home" over on www.mrscraftyb.co.uk

"Country Kids" over on www.coombemill.com

Monday, 20 June 2016

A year on the allotment: June 2016

I never cease to be amazed at the growth spurt our plants put on in June. The end of May and early June were really warm and the plot looked parched. Then the weather changed and we've had buckets of rain over the past ten days or so. It's not great for picnics, trips to the beach or festival goers - but it's great for the allotment.

child holds a rip allotment strawberry

One crop in particular loves the wet British weather - the humble spud. The photo below shows Magoo watering the new bed on the 3rd June. You can just see the potato leaves poking out of the soil.

child helps to water the crops on the allotment

Fast forward to the 18th June, just fifteen days later, and you can hardly see Magoo as she weeds the area around the same potato bed. The rate of growth is amazing. We should be able to start harvesting our first spuds soon.

child helps to weed the allotment plot

We've already started to eat our first strawberries - they are delicious. Sadly the slugs and snails have munched their fair share of them. The wet weather brings the slimy molluscs out in force. We did spot a large frog in the strawberry bed. Apart from making us jump when he jumped, I'm hoping our resident frog is making a dent in the slug population...

strawberries ripening in a raised bed

We've also planted out some sprouts. It's the first time we've grown them, so I'm hoping we will be sitting down to Christmas lunch with homegrown sprouts. It's hard to imagine these fairly small seedlings will grow into sturdy sprout trees. If the slugs don't get them first. We don't use slug pellets, so we aim to plant out more than we need, then we can cope with some losses.

brussel sprout seedlings on the allotment

Magoo has her own raised bed and she gets to choose which crops go in there. This year she wanted to grow peas and broad beans. The peas are doing well and we spotted the first pods at the weekend. The broad beans are getting attacked with black fly as per usual. My Mum has sprayed them with a soap solution, so hopefully they will perk up soon.

peas growing up sticks on the allotment

We have a section of our allotment dedicated to flowers. Many of them are native wildflowers and the bees love them. Apart from brightening up the plot, it's important to attract pollinators. A neighbouring plot holder has two bee hives, so there's always plenty of them making the most of our flowers.

native wildflowers growing on our allotment

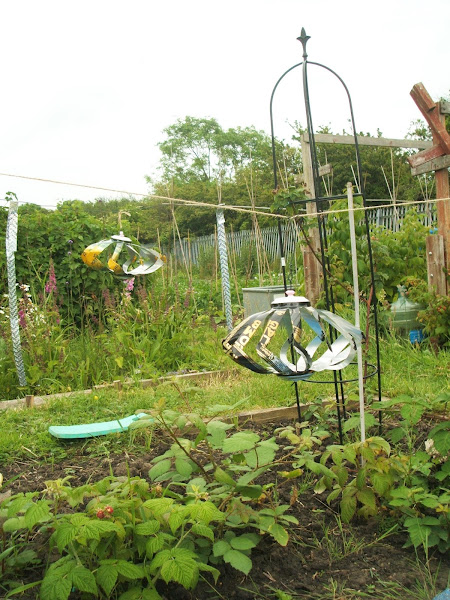
I've installed these windspinners made with recycled drinks cans by the raspberries and tayberries. I'm hoping they will deter the birds away from the soft fruit when they start to get ripe. If you'd like to make your own windspinners, head over to my tutorial. I'm planning on making more because they look great spinning away in the wind.

windspinners made with recycled cans on our allotment

Magoo did a sterling job helping to clear our ever expanding weed collection at the weekend. I find that the promise of fig rolls and a few jelly sweets help to coax Magoo into assisting Mum and Dad with the weeding. I think her limit is about twenty to thirty minutes of working away with her trowel, which isn't bad for a six year old. Plus we found these pretty blue flowers amongst the weeds. As Eeyore quite rightly says "Weeds are flowers too, once you get to know them."

small blue fower found on our allotment

This week I'm linking up with these lovely blogs...

"Country Kids" over on www.coombemill.com
"How Does Your Garden Grow" over on fableandfolk.com

"Point + Shoot" over on youbabymemummy.com and www.snowingindoors.com

"Making Home" over on www.mrscraftyb.co.uk

"Whatever the Weather" over on monkeyandmouse.co.uk

Thursday, 9 June 2016

How to make amazing windspinners with upcycled drinks cans

completed upcycled drinks can windspinners

I’m always looking for interesting decorations to put on our allotment.
I spotted some upcycled wind spinners made with drinks cans online and decided to have a go at making some. I’m really pleased with the results and wanted to share the making process in this tutorial.
They are really simple to make and once you’ve made a couple, you’ll get the hang of it.
I hope you enjoy making them too, I think they look great spinning away in the wind…

what you will need to make wind spinner

You will need…
2 clean aluminium drinks cans
10” of stiff wire (I’ve used PVC-coated garden)
Kitchen scissors
Bradawl (a nail & hammer work just as well)
Long nose pliers
Combination pliers (to cut the wire)
Tin opener
4-6 beads (plastic or wooden)
Masking tape
Marker pen

For my wind spinners I have used tall aluminium cans, the type you get beer or cider in. The taller cans make a larger spinner. You can use smaller soft drinks cans if you prefer.

preparing drinks cans to upcycle into wind spinners

Step 1:
Using a tin opener, cut the tops off the cans (ring pull end). Once the top has been taken off, rinse out thoroughly and leave to dry. Once dry, trim down the excess aluminium at the top of the cans.

prepping drinks cans to make wind spinners

Step 2:
Now you need to cut the cans to create 12 fairly equal ‘spokes’. One method is to wrap a piece of masking tape around the can and mark off equal sections with marker pen to guide you. Try to get the spokes as equal as possible, but don’t get too hung up on it. Once the spokes are joined together, the overall effect looks good even if you haven't got every single spoke exactly the same width...

marking off spokes for wind spinner

Step 3:
Once you are happy with the marking off of your 12 spokes, use the kitchen scissors to cut slits from the top edge to within 1/4" from the bottom.

cutting spokes on upcycled wind spinner

Step 4:
Next, open out each of the spokes outward and down. Tip: press your thumb against the bottom of each spoke before bending them out - it will help stop the metal from crimping.

creating wind spinner spokes

Step 5:
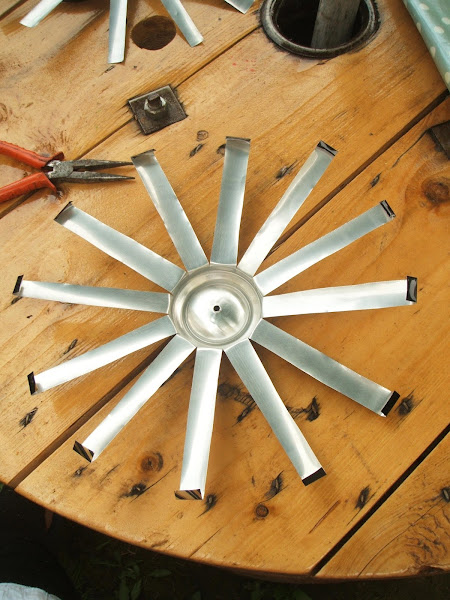
Once you have fanned out the spokes, you should have something that looks like this. Repeat with the other can…

fanned out spokes on windspinner

Step 6:
Using the bradawl (or hammer and nail) punch a hole in the bottom of both cans.

fanned out spokes of drinks can wind spinners

Step 7:
Use the long nose pliers to fold over the end of each spoke (about 1/4" is enough). Repeat process on both cans.

pliers bend ends of wind spinner

photos showing process of creating wind spinner

Step 8:
Now you are ready to construct your windspinner by joining the spokes together. Overlap the end of a spoke from one can with the end of a spoke from the second can. Slide the corners together and hold firmly with the fingers of one hand, use the long nose pliers to bend the corner over. Use the pliers to crimp the corner tightly together to secure the spokes.

step by step tutorial showing how to make drinks can windspinner

Step 9:
Move onto the next spoke and repeat the above process. Keep linking the spokes together until they are all joined up. Your wind spinner should now look like this…

completed upcycled soda can wind spinner

Step 10:
Using the long nose pliers bend the end of the wire to make a small loop. Thread 2-3 beads onto the wire and then thread the wire through the holes, top and bottom, in the cans. The wire should now run through the centre of your wind spinner. Thread the remaining 2-3 beads onto the wire.

attaching beads to upcycled windspinner

tutorial making drinks can windspinner

Your wind spinner is now ready to hang either in your garden or on an allotment plot. It is possible to stack 2-3 spinners on top of each other. Just join the wires together or thread a longer piece of wire through the centre. Just remember to thread beads between each spinner or they wont rotate in the wind.

tutorial showing how to make upcycled drinks can windspinner

They really come alive when they are spinning in the wind. So I'm going to try and get a video of one of my spinners 'in action' on our allotment plot...

There you go, a great way to upcycle empty drinks cans…enjoy!

Feel free to pin the image below to your Pinterest, but please link back to this post, thank you!

I'm linking up with...

Trash2Treasure over on www.coombemill.com

HomeEtc over on www.thetwinklediaries.co.uk and mummyofboygirltwins.com

Making Home over on www.mrscraftyb.co.uk

Thursday, 25 February 2016

A year on the allotment: February 2016

In my January allotment update I said our battered old shed was 'leaning more than the Tower of Pisa'. We've been debating whether to buy a new one for some time now. On the 8th of February, Storm Imogen huffed, puffed and blew our shed down. So the decision was made for us. The shed had been lifted clean off its base and scattered across our neighbour's plot.
storm imogen flattens our allotment shed and scatters it across the neighbouring plot
My Mum and I went to the plot once the storm had calmed down to clear up some of the mess. With no shed to store all our stuff we needed to take our tools, wheelbarrow and other gardening bits home.
clearing up on our allotment after storm imogen flattens our shed
We couldn't sort out the actual shed because it was too heavy to lift. But I knew Mr. M would step in to break it up into smaller pieces. He bought an axe a few weeks ago and he's been itching to find a project to use it on. I think he has visions of chopping down trees and living like a lumberjack somewhere rural. Sadly there's not much call for axe-work in our house, so when I said there was a shed to chop up, he jumped at the chance.
taking an axe to our storm damaged allotment shed
storm imogen demolishes our allotment shed we finish the job off with an axe
It didn't take long to break the shed up. We kept the door and some of the panels to make raised beds or edging pieces for the plots. We always try and recycle stuff if we can. But sadly, most of the wood was shattered by the storm, so it had to go to the tip.
carrying away our storm damaged allotment shed, some pieces will be recycled on our plot
Magoo was desperate to be involved with the shed-breaking, but we had to clear it away on a school day, sadly she had to miss out. I promised we would have a bonfire with some of the shed pieces in half term or after school one day.
A couple of days ago we managed to get down to the plot on a sunny evening. It was the first post-school trip we've made this year, it's lovely to have the lighter evenings back again.

Magoo helped stack some shed pieces into the bin incinerator. Then we stood back and watched Mr. M light the fire. Sadly the wood was a too damp to burn well, so it was a bit of a let down for Magoo. But it was such a beautiful sunny evening, it didn't dampen our spirits too much. We abandoned the bonfire and played a very long game of hide and seek instead.
storm imogen turns our allotment shed into firewood, chopped up shed sits in our bin incinerator

We have finally taken the plunge and purchased a new shed. This one is wider and has room for a couple of chairs and maybe a little stove, which is exciting!
Mr. M has been roped in to put the shed together and hopefully March's blog post will feature our brand new shed...
This week I'm linking up with these lovely blogs:
How Does Your Garden Grow
Whatever the Weather over on www.lifeunexpected.co.uk and monkeyandmouse.co.uk
Share with Me over on www.letstalkmommy.com
Point + Shoot over on youbabymemummy.com and www.snowingindoors.com
Country Kids over on www.coombemill.com
Happy Days over on www.whatkatysaid.com and www.quitefranklyshesaid.com


LinkWithin

Related Posts with Thumbnails