Showing posts with label embroidery hoop. Show all posts

Saturday, 21 October 2017

Create an Autumn embroidery hoop using fishbone stitch

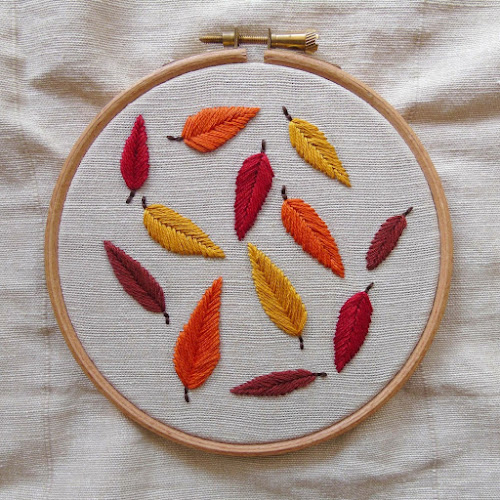
I love all the Autumnal colours that start to appear at this time of year. I decided to create an Autumn themed embroidery hoop using Fishbone Stitch to represent falling leaves.

falling autumn leaves created using fishbone stitch

Fishbone Stitch is great for creating leaves or feathers. There are lots of tutorials on the internet, I suggest searching youtube for a video to help give you a visual step-by-step guide. If you've never tried this stitch before, practise on some scrap fabric first. It took me a while to get the hang of it, but once I did...I fell in love with Fishbone Stitch.

I started this hoop by using pencil to sketch onto linen fabric a number of teardrop shapes. These will make up the falling leaves pattern. When stitching Fishbone, I like to also draw a central line down the middle of the teardrop to help guide me. I find this central line helps me to create a neater shape.

autumn leaves embroidery hoop created using fishbone stitch

I drew 12 teardrop shapes in various sizes, but you could add more or less depending on your hoop size. I then selected a number of threads in Autumnal shades, such as mustard yellow, crimson red, warm orange and russet brown. I could then begin to create the Fishbone Stitch.

fishbone embroidery stitch created in crimson red thread

fishbone stitch in mustard yellow DMC thread

I found this was the sort of project I could dip into now and again, adding a leaf or two in the evening once my daughter had gone to bed. Once the Fishbone stage was complete, I added two small backstitches in dark brown thread at the base of each teardrop to create a leaf stalk effect.

creating falling leaves embroidery hoop using fishbone stitch

What do you think?I am really pleased with the way it has turned out.
I've had a great response & lots of lovely comments on this piece over on my Instagram feed...
I think it is a simple but effective hoop to create on these darker evenings.

– And finally, if you would like to follow me on Twitter, Pinterest and Instagram, you’re more than welcome!

Wednesday, 1 February 2017

Free beatles inspired valentine embroidery pattern

I created this Beatles-inspired embroidery hoop for Valentine's Day last year. I wanted to share the pattern with my blog readers. You are welcome to download and print the pdf pattern featured at the bottom of this post.

There's something so uplifting about the Beatles "All You Need Is Love". Reading about the song online, the Beatles said this song: "cannot be misinterpreted. It is a clear message saying that love is everything". With this in mind, I was inspired to stitch a section of the song.

I transferred my template onto a piece of vintage fabric, but it works equally well on plain fabric.

I created my hoop using backstitch in a bergundy thread.

You could use any stitch or colour thread - how about embellishing the text with your own design ideas? Maybe some extra hearts or flowers.

Click on the arrow in top right corner of the image below to open in a new window. Free to download and print...enjoy!

If you love crafting, you might like to join our new Instagram community. Tag your creative images with #craftingismytherapy_february to join in. The hashtag will change to reflect the month we are currently in. Head over to my Instagram account to find out more...

I'm linking up with these lovely blogs:

HomeEtc over on thetwinklediaries.co.uk and mummyofboygirltwins.com

Thursday, 3 November 2016

Crafting in October: embellishing vintage fabric with stitches

vintage irish linen embellished with embroidery stitches

As someone with a huge collection of vintage fabric scraps and offcuts, it makes sense to use them in my crafting. I have been making and selling handmade homewares on Etsy since 2007 and I've always used retro fabrics. I have amassed heaps of pretty scraps and I never know what to do with them. Until I have time to sew an enormous vintage fabric quilt, I will make do with using some of it for embroidery practice.

vintage linen featuring chain stitch embroidery

vintage fabric embroidery hoop project

I find the bold, floral patterns of fabrics from the 1960s and 1970s lend themselves perfectly to hand embroidery. It offers me a lovely template to work with and the only limit is your imagination. It's also a no-stress project that you can pick up and put down whenever you want. So far I have added chain stitch around the flower and a little circle of French Knots in the middle. Over time I can add more or move onto another flower on the fabric and create new effects with different stitches.

sewing chain stitch onto vintage irish linen fabric

vintage fabric and embroidery stitches

As ever, I find hand sewing relaxing, even though I have less time than I've ever had with starting a college course in September. I also have lots of ideas for handmade Christmas gifts, but I have no idea where I will find the time. I don't like the conflict in my brain when I have ideas but no time to complete them. But it's something I hear from lots of other crafters, so I know I'm not alone. If I could find a way to go into a parallel craft universe, that would be amazing. Until then, I grab some stitching time as and when I can...

vintage fabric hoop placed inside work box

vintage fabric with chain stitch and french knot embroidery

One of the things that has caught my eye on Social Media this month are the "Crafternoon" events to raise awareness of Mind and mental health issues. I will write more about this on my Crafting is my Therapy blog post, which will go live tomorrow (Friday 4th November). You can read about organising a "Crafternoon" by following this link

I am linking up to November's 'Crafting is my Therapy' with this blog post. If you blog about crafts, we'd love to have you on board. The linky will open on 4th November at 7pm (GMT) and stays open for the whole month – giving you plenty of time to get involved.

Do you pin? I would love to connect with you over on Pinterest...

Friday, 23 September 2016

Crafting in September: learning ribbed web and lazy daisy stitch

embroidery hoop used for practising web stitch

At the start of the year I decided to embrace my creativity and try and reignite my sewing mojo. I wanted to try and create a piece of hand embroidery for every month of the year. I also wanted to push myself and learn some new stitches.

This month I had an idea in my mind for embellishing a piece of vintage fabric with embroidery stitches. I thought the ribbed web stitch would look great in the middle of a retro flower. Having never sewn this stitch before I turned to Youtube to hunt down some tutorials. I particularly liked the one posted by Mary Corbett and watched it a few times to get the gist of the stitch.

It's a mix between sewing and weaving and it creates a striking web effect on the fabric. I really like it but got in a complete muddle with my first attempt. You can see it below (brown and red thread). I kept messing up the wrapping around and moving along the 'spokes'. Easily confused you see...

first attempt at ribbed web stitch

My second attempt turned out better, see below. But I still had some uncovered spokes, which isn't quite right...

creating a eight point ribbed web stitch

Third time lucky...I think I've cracked it. I still need to practise, but understand what I need to do now. It's a soothing stitch because the weaving motion is relaxing. It's also nice seeing the thread build up on the fabric into a web pattern.

practising ribbed web stitch on an embroidery hoop

In between the web stitch I also attempted the lazy daisy stitch. I found it hard to keep the 'petals' even, but I'm sure that's just down to practice. Again I really love this stitch and it's useful for creating detail on a piece - a classic stitch which I really wanted to master. If you're interested in learning lazy daisy or detached chain stitch yourself, head over to Mary Corbett's Youtube tutorial

crafting is my therapy practising embroidery stitches

If you enjoy crafting for relaxation, you may like my blog link-up...

The focus of the linky is crafting for pleasure, basically taking some ‘me-time’ to unwind in our busy lives. It doesn’t have to be a finished project, we love seeing work in progress, planning posts or tutorials too. You can find out more about "Crafting is my Therapy" by clicking on this link

Me You and Magoo

If you'd like to see a selection of post previously published on my blog, you can visit my Pinterest account here - I'm always happy to connect with other Pinterest fans...

Sunday, 31 July 2016

Crafting in July: hand embroidered butterfly hoop

"Happiness is a butterfly, which when pursued, is always just beyond your grasp, but which, if you will sit down quietly, may alight upon you" - Nathaniel Hawthorne

At the start of July I decided to create a piece of embroidery featuring a butterfly motif. I'd recently watched Butterflies: A Very British Obsession over on BBC4 and I was inspired to stitch one of these beautiful creatures.

I downloaded a free template from the web and transferred the image onto a piece of linen. I chose this particular motif because it would give me the opportunity to try out a number of stitches. In particular I wanted to attempt satin stitch which I haven't tried for many years...

I started by outlining the wings in backstitch using a lovely teal thread.

I moved onto filling in the lower wings with satin stitch. Like I say, I haven't attempted this stitch for a long time. I looked at a number of tutorials online and then took the plunge. At first I wasn't happy with the way it turned out. To me, the stitches looked messy and uneven. I had recently read the satin stitch tutorial over on the Sublime Stitching site.

I love Jenny Hart's laid back attitude to embroidery. She makes you feel that you don't have to get too hung up about it all...her attitude towards Satin Stitch is summed up here: "It will probably look really terrible to you. Stop looking at it. Set it down, forget about it, and then pick it up again later. I bet you will be surprised by how nice it looks"

So I've tried to take her advice and not stress about it too much. I need to practice more, but I think the overall effect now the piece is finished is good. I'm not a sewing machine, it's impossible to make every stitch uniform...it is handmade after all.

I really enjoyed sewing this butterfly and I feel more confident with using Satin Stitch. If you are interested in creating the same butterfly motif, you can find it here on Mary Corbet's Needle and Thread website

With the school holidays in full swing, it's harder to find the time to sit down and sew. I need to think of a new project for August and it will probably involve a quote. I dyed some linen fabric a sunny yellow colour a few weeks back, so I'd like to incorporate it into my next crafting project...

I am linking up to August's "Crafting is my Therapy" with my butterfly hoop.

Me You and Magoo

The focus of this link-up is crafting for pleasure, basically taking some ‘me-time’ to unwind in our busy lives. It doesn’t have to be a finished project, we love seeing work in progress, planning posts or tutorials too. If you'd like to find out more about Crafting is my Therapy, please head over to this blog post.

This week I am also linking up with these lovely blogs:

HomeEtc over on www.thetwinklediaries.co.uk and mummyofboygirltwins.com

Sunday, 6 September 2015

A new project: rabbit applique hoops handmade with vintage fabric

I've been making my lavender-filled, vintage fabric rabbits for nearly six years now. Alongside my handmade sleepy owls, they have proved to be one of my biggest selling items. I have had many customers buy more than one because 'they can't decide on the colour' and many have come back to buy more for friends and family as gifts.

I use a particular type of thick vintage fabric and I have amassed a selection of colours over the past few years. I find this particular fabric features colours that really pop and they rarely fade. People seem to love these vibrant colourways, I'm a big fan of them too, in fact I have about six or seven lavender rabbits dotted around our home.

I decided a little while ago that I would attempt to make an applique version of the rabbit motif. I knew I would need to adapt the shape slightly because the template I currently use is wider due to seam allowances. After a bit of sketching I created a new template. Once the main body of the rabbit was cut out I attached the rest of the felt detailing and eyes. With the help of a bit of Bondaweb I attached the rabbit to some calico and started the applique process. I have used a combination of back stitch and blanket stitch. I adore blanket stitch and it has always been an important part of the lavender-filled design.

I have to say I am really pleased with the results. I put a photo of the finished item on my Pouch Vintage Facebook page and was pleasantly surprised by the positive response. I think I may try and sew a few ready to go into my online shop in time for Christmas. I'm currently putting together another rabbit-hoop in a different colourway. I will post photos once I have finished it...

Tuesday, 9 July 2013

Personalised wedding cushion

I love hand sewing. I love the rhythm of sewing with needle and thread, I find it very relaxing. I've been using blanket stitch for quite a few years on my rabbits and owls. To be honest, I was getting a bit bored with blanket stitch and I wanted to learn new techniques.
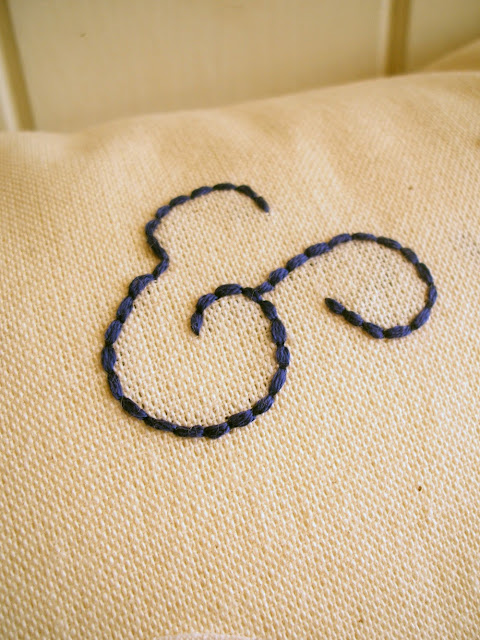
I've always been a fan of embroidered handwriting, so I wanted to give it a whirl. I looked at various blog posts and different tutorials for creating stitched handwriting and then I made a start with a few samples. I have to say, I'm completely hooked.

personalised handmade wedding cushion with vintage fabric hearts and embroidery


I wanted to practise more by creating gifts for people I know. So I created this personalised cushion for friends of ours who got married last year. We were moving house at the time they got married, so things were too hectic for me to create a handmade gift. I always had an idea in my head for creating a unique gift for them, but we needed to be settled in our new home before I could complete it. So this cushion turned into an anniversary gift which I gave to my friend a few weeks ago. I'm really pleased with the way it turned out. I love the font and the vintage fabric used for the hearts is really pretty. I'm still hooked on hand sewing writing, I'm working on a cushion for my daughter and a few other ideas...so watch this space for more photos!
personalised handmade wedding cushion with vintage fabric hearts and embroidery


Monday, 4 February 2013

Get stitching!

I've felt in a real creative slump recently...moving house hasn't helped, in fact it's stopped me from sewing for many weeks now. I felt like I needed to do something to push myself a bit more and try and learn something a bit different. I've always loved hand sewing and blanket stitch is something I love doing for my owls and rabbits, but I felt it was time to learn a few more stitches. I started having a look around on the internet and got completely sucked into embroidery tutorials, stitching blogs and oh so many video tutorial on youtube. It is seriously addictive and once you start looking at all the embroidery stitches that are our there and all the amazing work people have created, you just want to grab some thread and give it a go!

I was very lucky to receive some beautiful handmade wedding presents. One of which is the owl and the pussycat image at the top of this blog post. Made by the wonderful Sally of Tinkering Times, it hangs on our bedroom wall and I look at it everyday. Recently, I've started to study it in more detail and look closely at the stitches, all the tiny details Sally added to this piece never cease to amaze me.

So, inspired by Sally's work, I ordered an embroidery hoop, got out my embroidery thread, begged a couple of crewel needles from my Mum and started to try out some embroidery of my own. Since looking at a few tutorials I can now recognise some of the different stitches and I have to say that I have fallen slightly in love with split stitch. Having always had an urge to embroider words, split stitch fits the bill nicely. I've always loved blanket stitch, but split stitch is so lovely for creating letters.

I'm pretty please with my first attempt. I think I may have had the thread too thick on the first set of letters I created, or maybe the letters were too small. I tried less thread and bigger letters on the second attempt and can't decide which I prefer. More thread gives a bolder look. I know the embroidery hoop bandwaggon has been trundling along for quite some time, but I can really see the appeal. I've got lots of handmade hoop gifts planned for all my family and friends now I've caught the letter-making bug. Also, once I've practiced a bit more, I'm going to make my daughter some personalised items and if I like them, I may make some more and stock them in my Pouch stores!

Just as a little footnote, I found this video to be very helpful, it's simple and informative and a great place to start if you're new to embroidery.

LinkWithin

Related Posts with Thumbnails