Showing posts with label garden. Show all posts

Thursday, 21 July 2016

Creating a sensory activity for adults living with Dementia

My husband has recently started a new job as an activities coordinator at a nursing home. He has worked as a support worker for many years now and has sung at a number of Dementia Cafes in our local area. I also work as a Shared Lives Carer and support a lady living with Dementia. You can find out more about our caring roles in my recent "It's Cool to be Kind" blog post.

a selection of herbs and flowers used in a sensory activity

As part of his activities coordinator role he devises ideas to stimulate the residents who live at the nursing home. Many of whom have limited sight, poor hearing and often live with dementia. One of the key features of his job is to promote discussion and stimulate old memories in order to try and keep minds as active as possible.

The home where my husband is the activities coordinator subscribes to the Daily Sparkle, a great tool for carers working with the elderly or dementia patients. The Daily Sparkle features evocative images, quizzes and reminiscence articles - all designed to stimulate memories and conversation.

collection of roses, lavender and homegrown herbs used in sensory activity

Taking this idea forward, he decided to create a sensory activity using plants from our garden and allotment. Fragrance and memory can be closely linked, certain smells often act as a trigger in recalling a long-forgotten event or experience.

homegrown rose used in a sensory activity aimed at adults living with Dementia

At the start of the week I helped him put together a selection of plants...these included:
- A highly fragrant rose
- Sprig of Jasmine
- Bunch of Lavender
- Handful of mint from our allotment
- Fresh Sage
- Fresh Oregano
- A few branches of Rosemary

homegrown jasmine used in sensory activity

It is true that your sense of smell can decline as you get older, but we chose plants with the strong scents. My husband also encouraged the residents to crush the plants, particularly the herbs, to release the smell. The sensory activity using fragrant plants proved to be popular. Those with the ability to see closed their eyes and tried to guess the name of the plant they were holding. Many of the residents have limited sight, so this activity was good for them because other senses like scent become more important.

Also, with limited mobility, some residents cannot access the garden at the home - so the opportunity to smell fresh plants was a pleasant experience for many. As an avid gardener myself, I take the scent of freshly dug soil, cut grass and floral scents for granted. If I were to lose my mobility or sight, then having fresh plants bought closer to me would be an important part of improving my quality of life.

rose, sage and jasmine used in nursing home sensory activity

I thought the large rose would prove to be the most popular scent. I was surprised when my husband told me it had been the fresh Sage that had prompted the most discussion. Many of the residents recalled cooking with the herb, particularly to make Sage and Onion stuffing for Sunday roasts and Christmas dinner. Before the days of packaged food, most people would have used fresh herbs in their cooking.

It's actually really lovely the Sage evoked memories of family meals. I think it's easy to forget elderly people living in nursing homes once had busy lives, running a home, possibly cooking with small children at their feet, multitasking - something many of us are familiar with. I'm glad the Sage from our garden bought back happy memories of families gathered around the dining table.

My husband and I recently signed up to the Dementia Friend initiative. The Alzheimer’s Society’s Dementia Friends programme is their biggest ever initiative to change people’s perceptions of dementia. Please visit the Dementia Friends website and take a few minutes to watch the video or attend an information session in your local area. And then hopefully you will pledge to become a Dementia Friend and help to support people in your community.

This week I'm linking up with these lovely blogs:
"Happy Days Linky" over on www.whatkatysaid.com and www.quitefranklyshesaid.com
"Sharing the Blog Love" over on hotpinkwellingtons.co.uk and dearbearandbeany.com
"The List" over on youbabymemummy.com and www.mrandmrstplusthree.com
"Blogger Club UK" over on www.cuddlefairy.com, www.myrandommusings.co.uk and mudpiefridays.com
"Making Home" over on www.mrscraftyb.co.uk

Thursday, 9 June 2016

How to make amazing windspinners with upcycled drinks cans

completed upcycled drinks can windspinners

I’m always looking for interesting decorations to put on our allotment.
I spotted some upcycled wind spinners made with drinks cans online and decided to have a go at making some. I’m really pleased with the results and wanted to share the making process in this tutorial.
They are really simple to make and once you’ve made a couple, you’ll get the hang of it.
I hope you enjoy making them too, I think they look great spinning away in the wind…

what you will need to make wind spinner

You will need…
2 clean aluminium drinks cans
10” of stiff wire (I’ve used PVC-coated garden)
Kitchen scissors
Bradawl (a nail & hammer work just as well)
Long nose pliers
Combination pliers (to cut the wire)
Tin opener
4-6 beads (plastic or wooden)
Masking tape
Marker pen

For my wind spinners I have used tall aluminium cans, the type you get beer or cider in. The taller cans make a larger spinner. You can use smaller soft drinks cans if you prefer.

preparing drinks cans to upcycle into wind spinners

Step 1:
Using a tin opener, cut the tops off the cans (ring pull end). Once the top has been taken off, rinse out thoroughly and leave to dry. Once dry, trim down the excess aluminium at the top of the cans.

prepping drinks cans to make wind spinners

Step 2:
Now you need to cut the cans to create 12 fairly equal ‘spokes’. One method is to wrap a piece of masking tape around the can and mark off equal sections with marker pen to guide you. Try to get the spokes as equal as possible, but don’t get too hung up on it. Once the spokes are joined together, the overall effect looks good even if you haven't got every single spoke exactly the same width...

marking off spokes for wind spinner

Step 3:
Once you are happy with the marking off of your 12 spokes, use the kitchen scissors to cut slits from the top edge to within 1/4" from the bottom.

cutting spokes on upcycled wind spinner

Step 4:
Next, open out each of the spokes outward and down. Tip: press your thumb against the bottom of each spoke before bending them out - it will help stop the metal from crimping.

creating wind spinner spokes

Step 5:
Once you have fanned out the spokes, you should have something that looks like this. Repeat with the other can…

fanned out spokes on windspinner

Step 6:
Using the bradawl (or hammer and nail) punch a hole in the bottom of both cans.

fanned out spokes of drinks can wind spinners

Step 7:
Use the long nose pliers to fold over the end of each spoke (about 1/4" is enough). Repeat process on both cans.

pliers bend ends of wind spinner

photos showing process of creating wind spinner

Step 8:
Now you are ready to construct your windspinner by joining the spokes together. Overlap the end of a spoke from one can with the end of a spoke from the second can. Slide the corners together and hold firmly with the fingers of one hand, use the long nose pliers to bend the corner over. Use the pliers to crimp the corner tightly together to secure the spokes.

step by step tutorial showing how to make drinks can windspinner

Step 9:
Move onto the next spoke and repeat the above process. Keep linking the spokes together until they are all joined up. Your wind spinner should now look like this…

completed upcycled soda can wind spinner

Step 10:
Using the long nose pliers bend the end of the wire to make a small loop. Thread 2-3 beads onto the wire and then thread the wire through the holes, top and bottom, in the cans. The wire should now run through the centre of your wind spinner. Thread the remaining 2-3 beads onto the wire.

attaching beads to upcycled windspinner

tutorial making drinks can windspinner

Your wind spinner is now ready to hang either in your garden or on an allotment plot. It is possible to stack 2-3 spinners on top of each other. Just join the wires together or thread a longer piece of wire through the centre. Just remember to thread beads between each spinner or they wont rotate in the wind.

tutorial showing how to make upcycled drinks can windspinner

They really come alive when they are spinning in the wind. So I'm going to try and get a video of one of my spinners 'in action' on our allotment plot...

There you go, a great way to upcycle empty drinks cans…enjoy!

Feel free to pin the image below to your Pinterest, but please link back to this post, thank you!

I'm linking up with...

Trash2Treasure over on www.coombemill.com

HomeEtc over on www.thetwinklediaries.co.uk and mummyofboygirltwins.com

Making Home over on www.mrscraftyb.co.uk

Thursday, 19 May 2016

DIY project to make you fall in love with wooden cable reels

One thing missing from our garden is a decent table for outdoor dining. Now the weather is warming up, we wanted to source a piece of furniture that would be robust enough to live outside all year round.

Somerset Wood Recycling is one of our favourite places to mooch around on a Saturday morning. I blogged last year about the wood we bought to make Magoo's upcycled garden swing. They have so many pieces of wood in all shapes and sizes at SWR. I don't have any carpentry skills, but I love looking at the wide range of patinas and grains on display.

However, Mr M does see himself as something of a woodsman. This year he bought himself an axe which we used to break up our allotment shed back in February. I think he has visions of living in the woods, carving his own bow and arrows. At Christmas I also bought him some wood whittling tools and a 'how-to whittle' book. Working with wood seems to be his thing, so he doesn't need much persuading if I suggest visiting Somerset Wood Recycling.

Last time we visited, a large pile of wooden cable reels stacked up outside caught our eye. We have considered making a table from one of these reels for quite a while now.

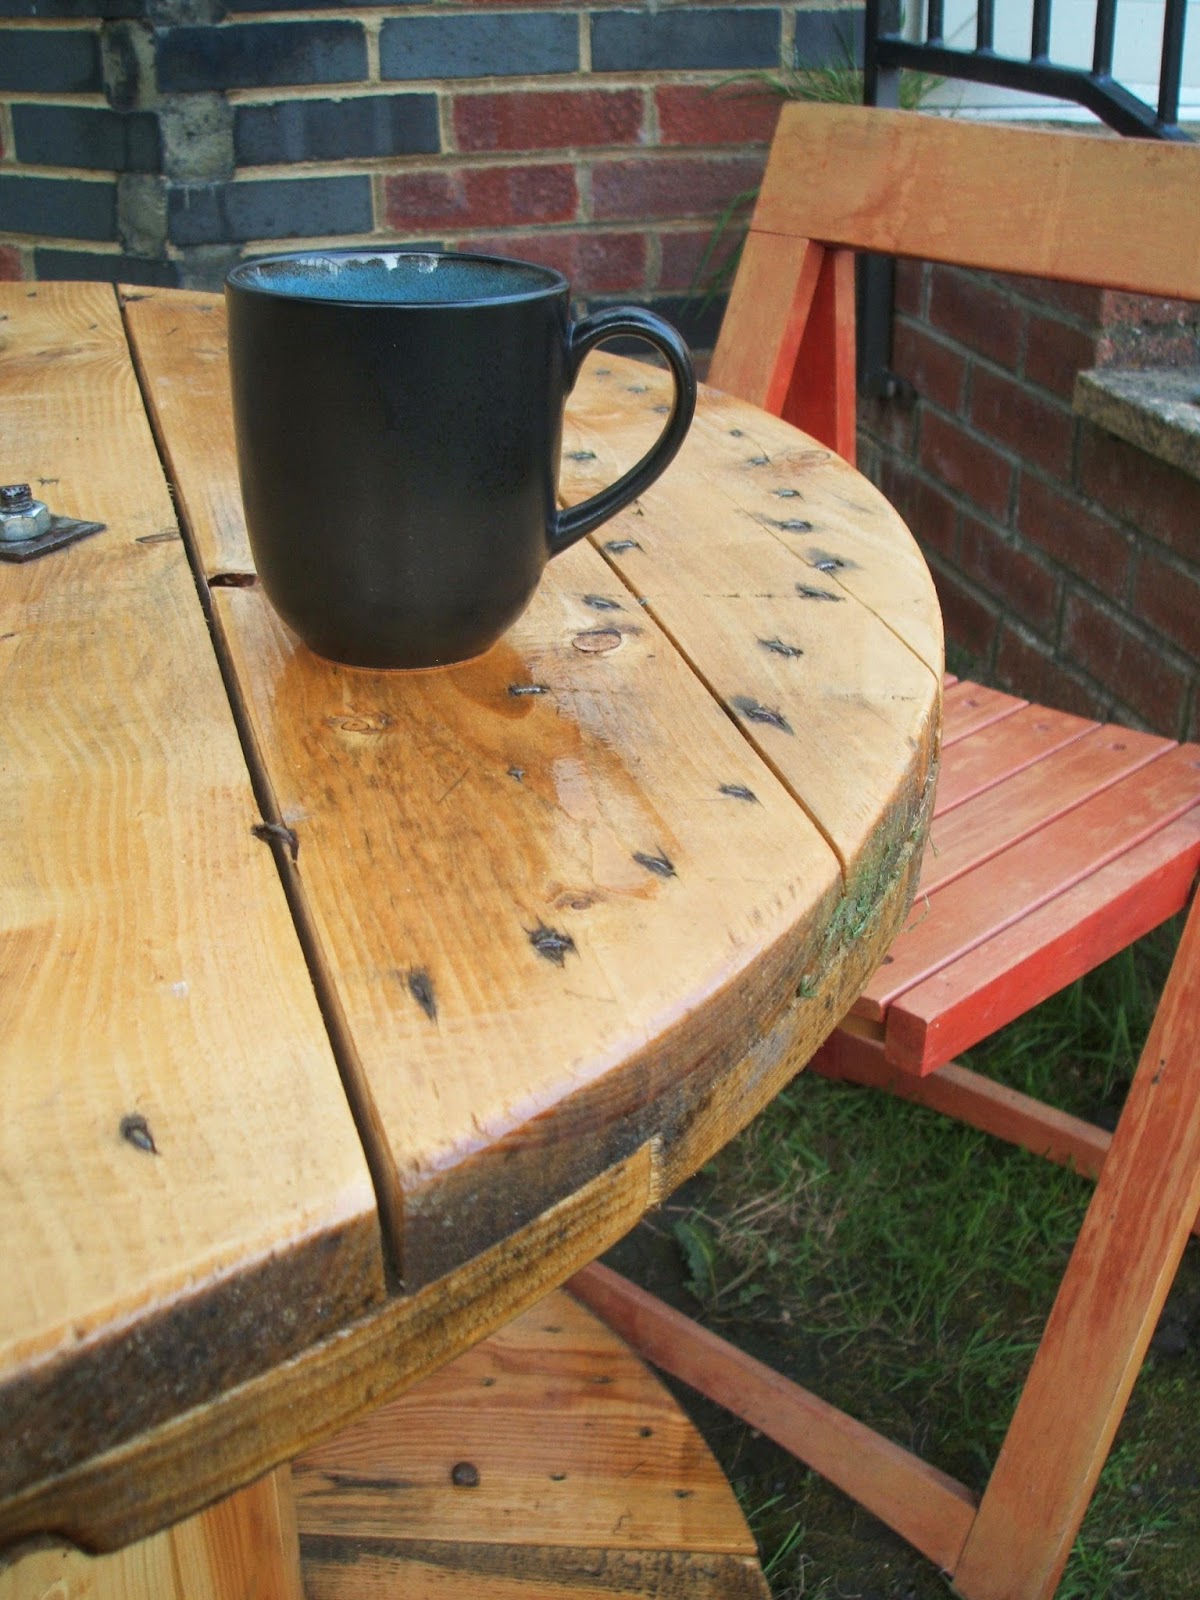
We decided a few weeks ago to buy the largest reel we could fit in the car. Once it was home, Mr M set about sanding it down. It was always going to be a rustic table so we weren't aiming for a perfect finish. Even so, the reel still had some very rough edges, we couldn't use it as a table until it was smoothed down.

After the sanding, Magoo wanted to pitch in and get involved with the project. Magoo and her dad set about painting varnish onto the wood. This table will sit outside all year, so we want to try and preserve it as much as possible.

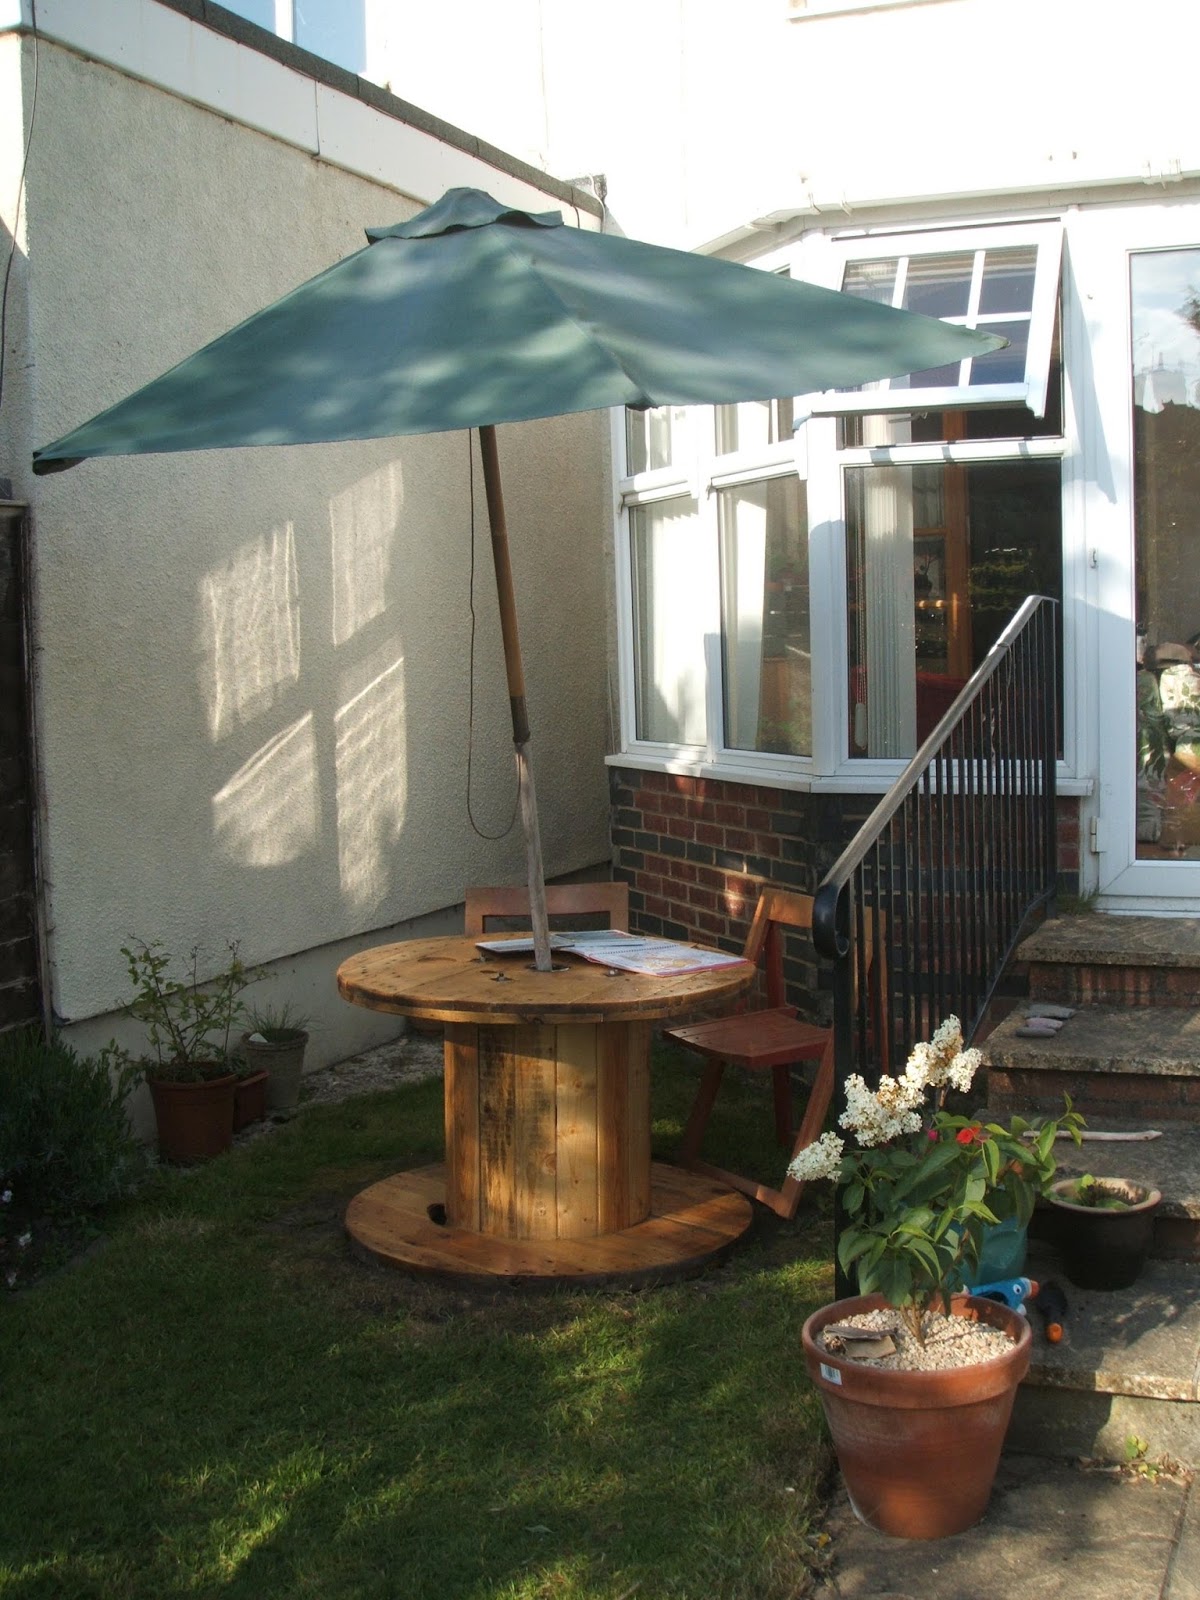
And that's pretty much all we did to create a strong, wooden dining table. Over the past few weeks we have used it for meals, playing board games and outdoor colouring sessions. It really adds an extra dimension to our garden and it was a bargain at only £20.

One of the best things about the wooden cable reel is there is a pre-existing hole right down the middle. Perfect for putting your sun umbrella in and no drilling required.

The next stage is to install a patio in the corner of the garden where the upcycled table will sit. We managed to get hold of some amazing slabs from FreelyWheely and they didn't cost a penny.

All in all it has turned out to be a thrifty DIY project. Since getting hold of our reel I have looked online to see how other people have upcycled theirs. There are so many fantastic example out there. We quite like the rustic look of the plain wood, but there is plenty of scope to get more creative with the cable reels. Some ideas include adding mosaic to the top, whitewashing the wood and wrapping rope around the central column.

I love these cable reels so much I'm going to go back and buy a smaller one for the allotment. It will be perfect for putting our cups of tea and sandwiches on...

I'm linking up with these lovely blogs:

"Trash 2 Treasure" over on www.coombemill.com

"Making Home" over on www.mrscraftyb.co.uk

"Let Kids Be Kids" over on letkidsbekids.co.uk

"Country Kids" over on www.coombemill.com

"Sweet Inspiration" over on repurposingjunkie.com

"Home Etc" over on www.thetwinklediaries.co.uk

Thursday, 2 July 2015

Calendula in July

I am a new convert to the joy of Calendulas. I only started growing them last Summer & fell in love straight away. They are one of the hardest working plants in the garden. As long as you deadhead them, they flower all Summer long from about June onwards. They have the sunniest flowers you're likely to find, the ones in my garden range from egg-yolk yellow through to sunset orange.
growing calendula plants from seed
On top of all that, they have amazing medicinal properties. Calendula oil is used as an anti-inflammatory and a remedy for healing wounds. It can be used for burns, cuts and infections due to it's natural anti-septic and anti-fungal properties. It's well worth keeping a tube of Calendula Cream in your medicine cabinet.
calendula plants growing in July sunny yello
calendula plants growing in July zesty orange
The Calendulas growing in my garden are from seeds I saved from last year. They've been drying in a cup all through the Winter and I planted them in March. I'm really pleased with how vibrant they are this year. The only thing I've noticed is the seed heads from this year's plants have hardly got any seeds on them. I'm not sure if second generation Calendulas lose the ability to produce an abundance of seeds.
calendula flower plants growing in July yellow bloom
I'm linking up with the wonderful How Does Your Garden Grow #HDYGG over on mammasaurus.co.uk


Sunday, 13 July 2014

Storytelling on the Somerset Levels

A couple of years ago my Mum visited a garden on the Somerset Levels...she kept telling me what an amazing place it was & saying things like "I can't really describe the place, but you really need to visit it next time it's open". So when we heard that the annual 'open garden' event was happening, we jumped in the car and drove out onto the Somerset Levels to see what all the fuss was about.

Well, she was right. It is an amazing place & it is hard to describe...but I'll have a go. The owners of the main farmhouse have created an intriguing garden which covers about three acres of land. You move around the garden from one part to another, almost like moving from room-to-room in a house and you never quite know what's going to be around the corner...here are just some of the things we saw...

a metal UFO-type sculpture cum look-out post,

We saw compost toilets adorned with silk scarves and flowers,

a disused bus turned into a cosy home,

a beautiful artists studio,

an outside bath warmed only by a log fire underneath,

the best handmade metal swinging garden seat ever,

hammocks dotted about the place,

a cosy yurt in the orchard,

willow sculptures,

fairy doors into the woods,

nets draped in the trees for adults to climb into & bounce about like big kids in,

and a lake created by the owners complete with arched bridge leading out to an island in the middle.

All this was accompanied by the atmospheric sounds of Fiddlers on the Hoof who were strolling around the garden with their accordion and fiddle. Later on when we settled down for some storytelling outside the artist's studio, they bought out a harp to accompany the stories. The whole place was magical.

I think it's wonderful that the creative people who own this home open their doors to raise money for the local hospice. If they didn't, we wouldn't have had the chance to glimpse into the amazing, enchanting garden they have worked so hard to create.

I'm linking up with #countrykids...hope you've all had fun out & about this weekCountry Kids from Coombe Mill Family Farm Holidays Cornwall

Saturday, 3 May 2014

chalk paint, daisy chains and sunshine

I blogged a little while ago about buying my first tin of Annie Sloan chalk paint. Since writing that blog post I have painted an antique wardrobe which now houses my collection of vintage fabric out in the hallway.

I am now a self-confessed chalk paint addict & I couldn't wait to get to work on my Ebay-bargain dresser we bought back in March.

It was a beautiful sunny day and we all changed into our scruffy clothes and got out in the garden to do some painting. My daughter was keen to get involved and as chalk paint is non-toxic, it's a great paint for kids to use (under supervision of course). She loved using the roller and she did a pretty good job of painting the back section of the dresser. Between the three of us, we managed to get one coat of chalk paint completed today. we'll do another coat tomorrow and finish off with wax in a few days time.

In between painting we had fun in the garden making daisy chains, playing catch and Max the cat had fun chasing string with my daughter...I don't know who ran round the fastest, my daughter or the cat. Sometimes it's lovely just to relax in your own back garden on a Bank Holiday weekend...especially if you can enlist your whole family to help out with the chalk painting!

This week I'm linking up with the lovely #countrykids at Coombe Mill

Country Kids from Coombe Mill Family Farm Holidays Cornwall

LinkWithin

Related Posts with Thumbnails